Disadvantages of Microgreens: An Honest Look at the Downsides
We love microgreens. We have grown them for over 7 years and eat them almost every day. But we are not going to pretend they are flawless. If you have searched for the disadvantages of microgreens, you deserve a straight answer instead of a sales pitch. So here is the honest version: the real downsides of growing and eating microgreens, why each one happens, and how the fast turnover usually balances them right back out.

Quick Answer: Do Microgreens Have Disadvantages?
Yes, but most of them are minor and manageable. The main disadvantages of microgreens are a short shelf life, the ongoing cost of seed, the fact that most varieties only produce one harvest, a small learning curve for beginners, the daily attention they need while growing, and cleaning trays between grows. Here is the key thing to keep in mind as you read: microgreens grow so fast that the turnover rate evens almost all of this out. You can grow more of them, in a shorter time, in a smaller footprint, with far less water than mature leafy greens and vegetables. Once you see them as a quick, repeating crop instead of a one-and-done garden, most of these downsides shrink fast.
The Disadvantages of Growing Microgreens
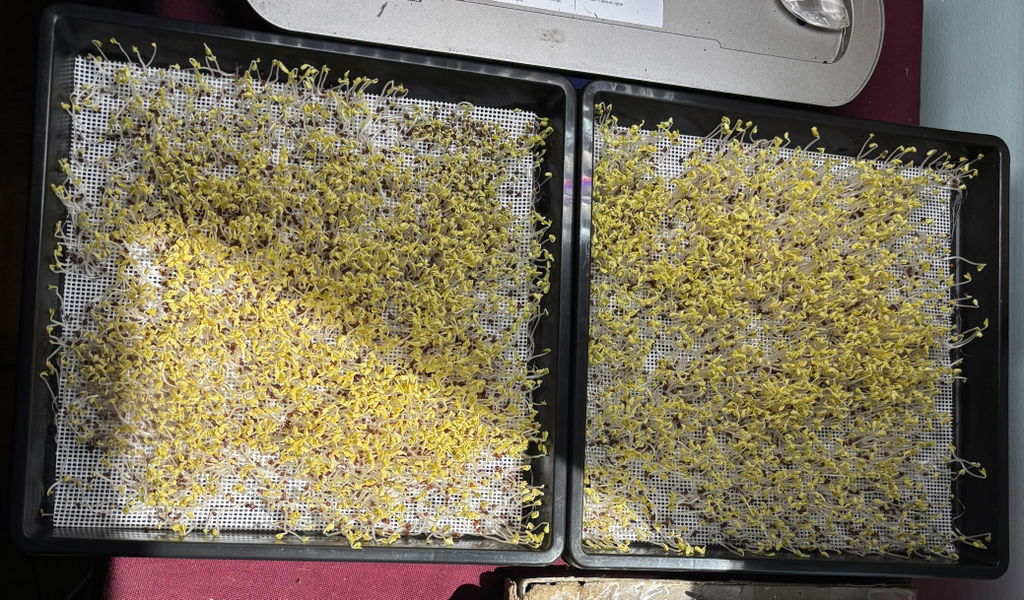
1. Short Shelf Life
Microgreens are a fresh, delicate green, so they do not last as long in the fridge as a sturdy head of cabbage. Most varieties stay good for about a week to about two weeks when stored properly, with some, like pea microgreens, lasting up to three weeks. The fix is simple: store them dry in a breathable container, do not rinse until right before eating, and keep them toward the front of the fridge so they do not get frostbitten against the back wall. The bigger picture helps too. Because a tray goes from seed to harvest in roughly 7 to 21 days, you are never far from a fresh batch, so a short shelf life rarely matters in practice when you grow on a schedule.

2. Ongoing Cost of Seed
Unlike a perennial herb you plant once, microgreens use a fresh batch of seed every grow. For heavy seeders like peas and sunflower, that seed adds up. But the cost per tray is still low for most crops, and the fast grow cycle gives you a quick return on every batch. Buying in bulk brings the cost down even further. We covered the math in our guide to buying microgreen seeds in bulk. We always source from True Leaf Market for quality seed sold specifically for microgreens.
3. Most Microgreens Don't Regrow
This surprises a lot of new growers. With most varieties, once you cut them, that tray is done. A few crops like peas and wheatgrass can give a smaller second harvest if you cut them high, but the majority are a single-harvest crop. We explain which ones come back and which don't in will microgreens regrow after harvesting. The workaround is staggered sowing. Start a new tray every few days and you are never without greens, regrow or not.

4. A Small Learning Curve
Microgreens are one of the easiest things you can grow, but there is still a short learning curve. Seeding density, watering, airflow, and timing all take a few grows to dial in. The most common early frustration is mold, which is almost always caused by overwatering, poor airflow, or seeding too densely. The upside is that because each grow only takes a week or two, you learn fast. You get a fresh chance to adjust every single tray instead of waiting a whole season. If you start with a forgiving crop and follow a proven process, you skip most of the trial and error. Our beginner's guide and top growing mistakes blog will get you most of the way there.
If you do run into fuzzy white growth and are not sure what it is, our complete mold guide walks through how to tell harmless root hairs from actual mold.
5. They Need Daily Attention
Microgreens grow fast, which means they need a quick check most days. Watering, especially during the early phase, is the one thing you cannot skip for long. It is only a few minutes a day, but it is a few minutes you have to actually show up for. The flip side is that the commitment is short-lived. A mature garden needs tending for months, while a tray of microgreens asks for that small attention for only a couple of weeks before harvest. Bottom watering on a consistent schedule makes it even easier, which we cover in our complete watering guide.
6. Cleaning Trays Between Grows
When you grow just a handful of trays, cleanup is no big deal. Rinse, scrub, sanitize, done. But like anything, once you scale up, it needs a well thought out process. Spent roots, leftover medium, and a growing stack of trays add up fast, and skipping a proper clean between grows is one of the quickest ways to carry mold or contamination into your next batch. The good news is this is a solved problem. A simple wash-and-sanitize routine keeps everything ready to go, and our reusable silicone grow medium and trays hold up to repeated cleaning, so you are not buying fresh supplies every grow. We walk through our exact method in how to clean and sanitize microgreen trays and reusable grow mediums, and a medium scraper makes quick work of leftover roots when you are turning over a lot of trays.

The Disadvantages of Eating Microgreens
The downsides on the eating side are even smaller, but worth knowing.
- Strong flavors aren't for everyone. Some varieties, like radish and mustard, are spicy and peppery. They work best as an accent rather than a base. If you want mild everyday greens, start with broccoli, kale, or pea shoots.
- They are not a meal replacement. Microgreens are nutrient dense, but the serving size is small. They are best used to boost the meals you are already eating, not to replace them.
- You still need basic food safety habits. Microgreens are not classified as a high-risk food the way sprouts are, but you should still start with quality seed, keep a clean setup, and rinse right before eating. More on that in our seed quality and food safety guide.
- A few plants are never safe as microgreens. This is the one true "do not" on the list. Never grow nightshades (tomato, pepper, eggplant, potato), rhubarb, or ornamental sweet peas as microgreens, and never use chemically treated seed. The rest of the popular varieties are safe and delicious raw.

How to Minimize the Downsides
Almost every disadvantage above has a simple fix, and most of them come back to the same strength: speed. Here is the short version:
- Stagger your sowing so a fresh tray is always coming and a short shelf life stops being a problem.
- Buy seed in bulk for the crops you grow most to lower your cost per tray.
- Start with forgiving crops like radish and broccoli to flatten the learning curve.
- Get airflow and watering right to avoid the mold and damping-off issues that frustrate beginners.
- Build a simple cleaning routine early so it scales with you instead of becoming a chore.
- Lean on the fast turnover instead of fighting it. Frequent small harvests beat one big one.
For the full step-by-step process from seed to harvest, our complete how-to-grow guide ties it all together, and our Beginner's Guide PDF puts every step in one printable resource.

So, Are Microgreens Worth It Despite the Disadvantages?
For us, the answer is an easy yes. The downsides are real but small, and the speed of the crop quietly cancels most of them out. A shorter shelf life does not sting when a new tray is days away. The seed cost is easy to justify when you are turning batches over so quickly. And the whole thing happens in a smaller footprint, with less water and less time, than growing mature leafy greens and vegetables. We compared exactly that in our look at microgreens vs. mature vegetables, and it is also why microgreens are such a strong choice for small spaces. Once you find your rhythm, the disadvantages fade into the background and the fresh greens become part of your routine. If you want ideas for actually using them, our guide on how to eat microgreens has 25+ everyday ways to work them in.
Frequently Asked Questions
What are the main disadvantages of microgreens?
The most common disadvantages are a short shelf life, the ongoing cost of seed, the fact that most varieties only harvest once, a small learning curve for beginners, the daily attention they need while growing, and cleaning trays between grows. Because microgreens grow so quickly, the fast turnover usually balances these out in practice.
Are microgreens expensive to grow?
Microgreens are inexpensive to grow for most crops, especially if you buy seed in bulk. The biggest ongoing cost is seed, since you use a fresh batch each grow. Heavy seeders like peas and sunflower cost more per tray than small-seeded crops like broccoli and radish, but the quick grow cycle gives a fast return on each batch.
Why don't my microgreens last very long?
Microgreens are a delicate fresh green, so they naturally have a shorter fridge life than hardy produce. Store them dry in a breathable container, rinse only right before eating, and keep them away from the coldest back wall of the fridge to avoid frostbite. Most varieties keep for about a week to two weeks, and some, like pea microgreens, can last up to three weeks.
Do microgreens regrow after you cut them?
Most microgreens do not regrow after harvest and are a single-harvest crop. A few, like peas and wheatgrass, can produce a smaller second harvest if you cut them high above the growing point. To keep a steady supply, start new trays on a staggered schedule.
Is it hard to grow microgreens?
Microgreens are one of the easiest crops to grow, but there is a short learning curve around seeding density, watering, and airflow. Since each grow wraps up in a week or two, you improve quickly and can fine-tune your process with every new tray. Starting with a forgiving crop like radish or broccoli removes most of the early frustration.
Is cleaning microgreen trays a lot of work?
For a few trays, cleanup is quick. As you scale up it takes a bit more planning, but a simple wash-and-sanitize routine keeps it manageable. Reusable trays and grow mediums hold up to repeated cleaning, and a medium scraper speeds up removing leftover roots between grows.
Are there any microgreens you should not eat?
Yes. Never grow or eat nightshades (tomato, pepper, eggplant, potato), rhubarb, or ornamental sweet peas as microgreens, and never use seed treated with fungicide or insecticide. Nearly all other popular microgreen varieties are safe and best eaten raw.
Final Thoughts
Every food has tradeoffs, and microgreens are no exception. But once you understand the real disadvantages, you can see how small and manageable they actually are. If you are ready to start, grab a forgiving crop, set up a simple schedule, and grow your first tray. The fresh greens are worth the few minutes a day.
Related Blogs
- How to Grow Microgreens: A Complete Step-by-Step Guide
- Why Are Microgreens So Good for You? The Nutrition Explained
- How to Start Growing Microgreens: A Beginner's Guide
- Top Microgreen Growing Mistakes and How to Avoid Them
- Microgreens and Mold: The Complete Prevention Guide
- How to Water Microgreens: The Complete Watering Guide
- How to Clean and Sanitize Microgreen Trays and Reusable Grow Mediums
- Will Microgreens Regrow After Harvesting?
- Why Are Your Microgreens Staying Short? Common Causes and Fixes
- Buying Microgreen Seeds in Bulk
- Microgreens vs. Mature Vegetables: Grow Time and Water Usage
- How to Eat Microgreens: 25+ Easy Ways
- Best Microgreens for Small Spaces
- How to Grow Radish Microgreens
- How to Grow Broccoli Microgreens
This post contains affiliate links. We may earn a small commission on qualifying purchases at no extra cost to you. We only link to products we use and recommend. See our full affiliate disclosure.
Nutritional information shared in this blog is based on commonly available research, peer-reviewed studies, and public health sources. We are not nutritionists, dietitians, or medical professionals, and nothing in this post should be taken as medical or nutritional advice. Always consult a qualified healthcare provider for personal dietary guidance.
— On The Grow®, LLC
Happy growing!